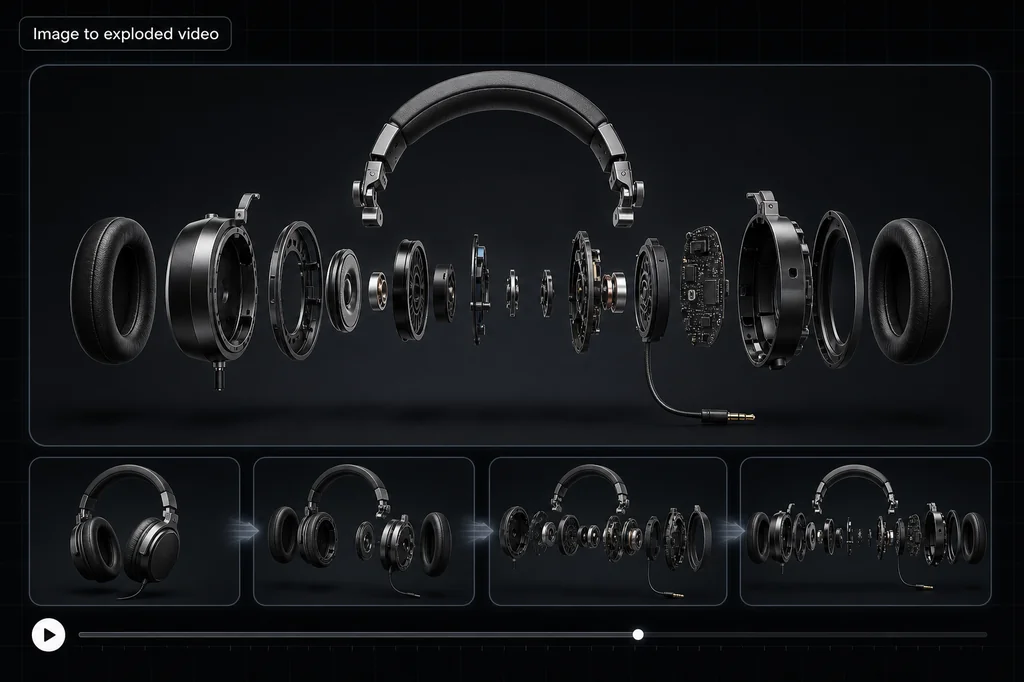
An AI exploded-view animation can be an excellent product-marketing visual: the shell separates, internal layers float into alignment, and the camera holds still while the product reveals its complexity. The reliable workflow is two-stage. First create a static exploded concept from a real product photo. Then use the assembled and exploded images as the opening and closing frames of a short video.
The important word is concept. A single exterior photograph contains no evidence about hidden screws, batteries, boards, connectors, tolerances, or assembly order. An image model will synthesize plausible-looking internals. That can be useful for a launch page, pitch deck, or visual treatment, but it is not a bill of materials, teardown, service diagram, or engineering drawing.
This guide uses Nano Banana 2 for the image edit and Kling O3 Pro for the animation. The screenshots come from the original Nano Banana Pro and Kling 2.5 workflow; the interface and model labels have since changed, but the first-frame/last-frame method remains the same.
What this workflow can and cannot do
| Use | Appropriate? | Why |
|---|---|---|
| Product-launch visual | Yes, with review | The goal is visual storytelling, not component-level truth |
| Pitch-deck concept | Yes, if labeled | A concept can communicate complexity without claiming exact construction |
| Social or motion ad | Yes, with brand review | Short controlled motion is the strength of the workflow |
| E-commerce product representation | Caution | Do not imply features or internals the sold product does not have |
| Service or repair manual | No | Invented geometry can create unsafe or costly instructions |
| Patent, compliance, or engineering documentation | No | Those uses require authoritative dimensions, parts, and relationships |
If you have CAD, a verified teardown, or internal photography, use it. Add those sources as references and have someone who knows the product approve the final image. If all you have is an exterior photo, label the result as a concept and avoid part names or technical callouts.
If the commercial job is to answer a buyer question on a product page—not dramatize hidden complexity—use the source-accurate PDP product-demo video workflow instead. It starts with one exact SKU, one approved visible transition, deterministic captions and poster imagery, exact storefront mapping, and completed-order guardrails. An exploded concept should not stand in for a demonstrated product state.
Step 1: choose a source image that can survive the edit
Use one sharp frame with the full product visible. A simple background and soft, even light make it easier to preserve the exterior silhouette. Leave negative space in the direction the parts will separate.
Prefer these source-image traits:
- the product is not cropped;
- the camera angle reveals its depth;
- labels and logos are readable;
- glare does not hide edges;
- the background has room for the exploded stack;
- no hand, cable, or prop crosses the separation axis.
The original example uses a hand-held iPad because it creates a striking social visual. It is also the harder case: the hand must stay anatomically stable while the device changes. For a production asset, a fixed product support is more repeatable.
Step 2: generate the static exploded concept
Upload the source image and use this prompt in Nano Banana 2:
Create a conceptual exploded-view marketing image from this product photo. Preserve the exact exterior shell, camera angle, lighting, background, logo, and visible details. Separate the product into five to eight broad, visually plausible layers along one straight axis with even spacing. Keep every layer parallel and aligned to the original body. Preserve the support or hand without changing its anatomy. Do not add labels, callouts, extra objects, loose debris, or technical claims. This is a concept visual, not an engineering diagram.
Why “five to eight broad layers”? A model has a better chance of keeping a simple stack coherent than inventing dozens of tiny fasteners. If you know the real high-level assembly—display, frame, board, battery, rear shell—name only the verified layers and provide references. Otherwise, leave the parts generic.
Generate at least four candidates. The most dramatic image is not automatically the best one. Reject any candidate that changes the exterior product, adds an unsupported feature, breaks the hand, duplicates parts, or turns the stack off-axis.
Static-image acceptance checklist
- Exterior silhouette, finish, camera cluster, ports, and logo still match the source.
- The hand or stand is intact and remains behind the same product edge.
- Layers share one axis, spacing rhythm, perspective, and light direction.
- No floating fragments, duplicate cameras, fake labels, or impossible intersections.
- The output is labeled “concept” wherever a viewer could mistake it for real construction.
Step 3: animate from assembled to exploded
Select the original photo as the first frame and the approved exploded concept as the last frame. A five-second duration is enough for a clear reveal. Keep the camera locked; the moving parts already provide all the visual energy.
Five-second locked-camera product reveal. Hold the fully assembled product unchanged for the first second. From one to four seconds, separate the visible layers smoothly along one straight axis until they match the supplied exploded end frame. All layers remain parallel, evenly spaced, and aligned; motion uses gentle ease-in and ease-out with no rotation, duplication, morphing, or new components. The hand, background, lighting, logo, camera angle, and exterior shell remain completely still. Hold the final exploded arrangement for the last second. No camera movement. Audio: one restrained mechanical separation sound and quiet room tone.
The end frame does most of the control work. Without it, a motion prompt asks the video model to invent both the destination geometry and the path. With it, the model can interpolate toward an approved composition.
Motion acceptance checklist
- The first and last frames still match the approved images.
- Parts move along one readable axis without spinning.
- The product does not gain or lose layers during the transition.
- The hand, support, logo, light, and camera remain stable.
- The animation settles before the clip ends.
- Audio supports the motion without implying a real mechanical operation.
If the animation fails, change one variable
| Failure | First correction |
|---|---|
| Parts spin or orbit | Replace “explode” with “translate straight along one axis; no rotation” |
| Extra parts appear | Reduce the static concept to fewer broad layers and regenerate the end frame |
| Product or hand deforms | Use a stand, crop out the hand, or shorten the movement distance |
| Camera drifts | Repeat “locked camera” and remove every other camera instruction |
| Motion is too fast | Use five seconds and reserve the first and last second as holds |
| End frame is missed | Simplify the gap between start and end or generate two shorter transitions |
Do not solve every failure by adding more adjectives. Fix the input geometry first, then the motion. If the static exploded view is incoherent, video generation will animate the incoherence.
A better workflow when accuracy matters
For a product you manufacture, start with authoritative sources:
- Export a simplified exploded render from CAD or photograph a controlled teardown.
- Use AI only for the environment, lighting treatment, or motion style.
- Keep the verified component geometry masked or composited from the source.
- Review the result with engineering, legal, and brand owners.
- Add a “concept visualization” disclosure if any hidden structure was synthesized.
That hybrid workflow preserves what AI is good at—art direction, relighting, transitions, and iteration—without asking it to infer facts that are not in the input.
The practical takeaway
The fastest credible workflow is: clean source photo, clearly labeled static concept, approved first and last frames, five-second locked animation, and a rejection checklist. Nano Banana 2 and Kling O3 make that sequence accessible, but they do not turn one exterior photo into engineering evidence.
Open the image prompt above, generate several concepts, and keep only the one that preserves the product and communicates the right level of abstraction. Then animate the approved pair in Kling O3. For more video-prompt structure, use the current Kling AI prompt guide; for model selection, compare the best AI video models for product ads.